Below are detailed step-by-step instructions for applying SDF from start to finish.
1. Set up your tray/dappen dish
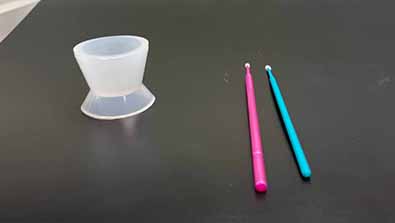
Use clean technique when handling anything that will go into the patient’s mouth. Wear gloves whenever handling SDF to avoid staining. Apply 1 drop of SDF to your dappen dish while taking care not to let the tip of the bottle contact surfaces.
One drop can treat up to 5 lesions depending on size. Based on the National Institutes of Health clinical trial, Effectiveness of Silver Diamine Fluoride (SDF) in Arresting Cavitated Caries Lesions, a maximum of eight drops should be used. (Prior guidelines advised a maximum of 1 drop/10kg of patient weight.)
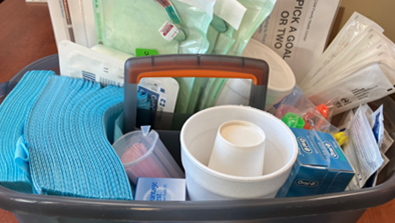
Keeping supplies stocked in a portable caddy is convenient for use in a medical setting. Preassembled kits are also available.
2. Patient preparation and positioning
See Preparing the Child for more information.
Have caregiver assist patient to brush teeth before proceeding. Use a plastic-lined tray cover (dental chucks) as a bib for your patient. Provide sunglasses or other protective eyewear. Using a cotton swab, apply petroleum jelly to the patient’s lips (and to gums if treating near gumline).
Position your patient to optimize patient comfort and ability to see the lesion(s). Positioning will vary by patient age, development, and ability.
3. Isolate and dry the lesion(s)
SDF works most effectively when the lesion is as dry as possible. Use gauze or cotton rolls to isolate the area you are treating and to dry the lesion(s). If you are treating adjacent teeth, isolate the quadrant and then dry and sequentially treat multiple lesions in the quadrant.
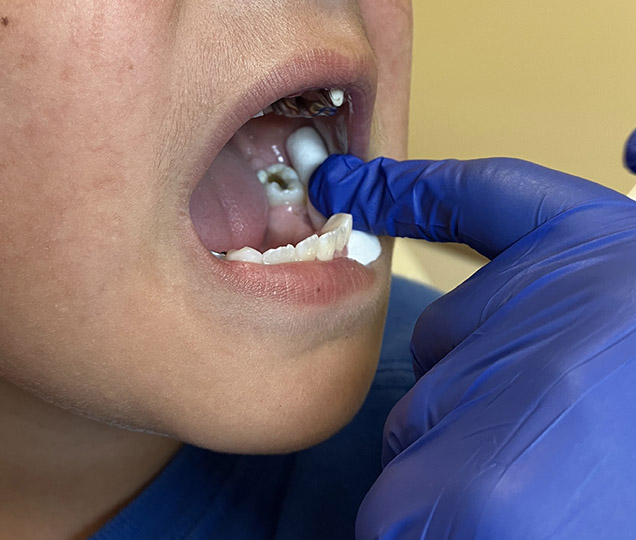
Isolate the lesion.
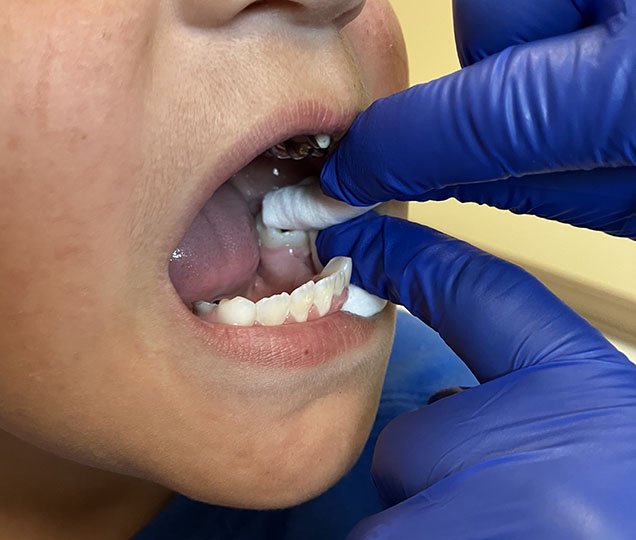
Dry the lesion.
4. Apply the SDF
Dip the micro applicator brush into the SDF in the dappen dish to absorb SDF. Choose the large brush for lesions larger than the size of the brush; otherwise use the small applicator. To transfer the SDF, touch the cavity with the microbrush until the whole lesion is saturated. For larger lesions, you may need to re-dip and continue until the lesion is saturated. If you are treating more than one lesion within the quadrant, quickly proceed to the next and repeat.
Treating a cavity between two teeth: Touch the cavity lesion as above with a small micro applicator. The SDF will absorb into the lesion via capillary action.
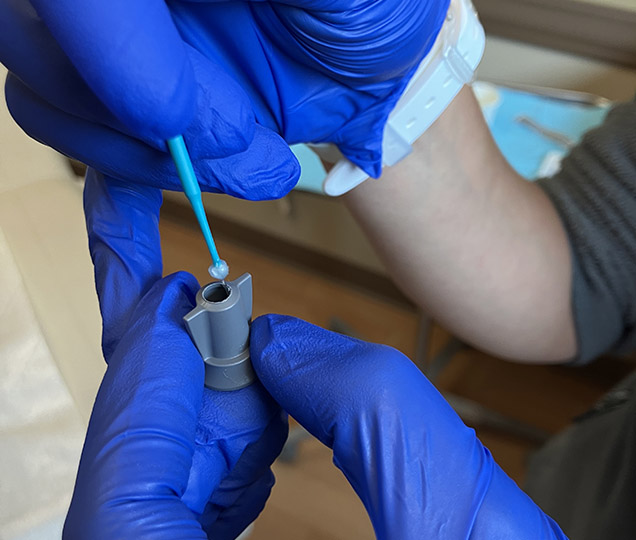
Dip the micro applicator brush into the SDF.
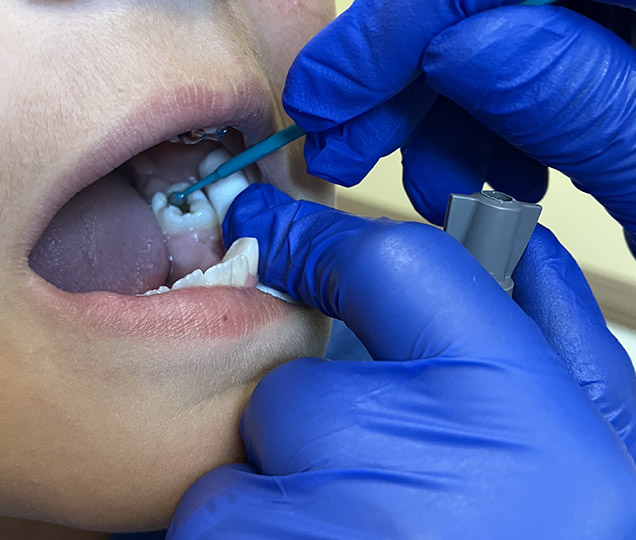
Apply SDF to the lesion.
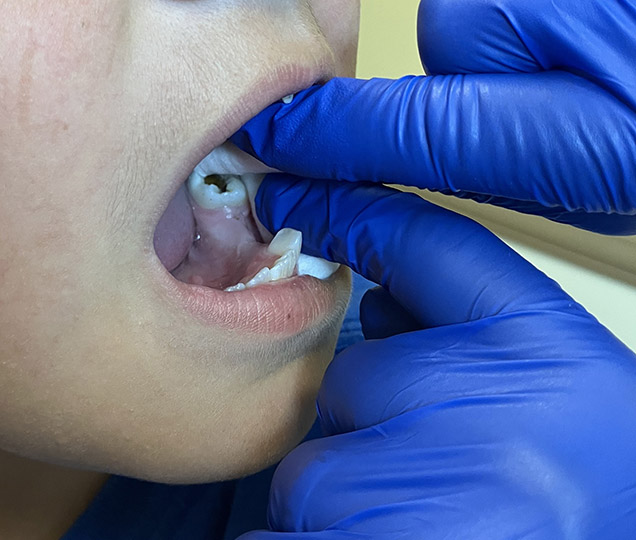
Remove excess SDF.
5. Wait for SDF to absorb
Wait for the SDF to absorb, at least 10 and up to 60 seconds. To help children maintain position, use distraction or a countdown. Dab with cotton to remove all remaining SDF from the cavity. Depending on the lesion, you can place a cotton roll on top of the SDF and ask the patient to bite down on it.
6. Apply fluoride varnish to other teeth
This may help prevent new cavity formation in other teeth. To mask the unpleasant, metallic taste of SDF, fluoride varnish or toothpaste (applied to the tongue) may be used. When applying fluoride varnish, care should be taken to avoid inadvertently spreading SDF to untreated teeth, especially if anterior teeth are not being treated. Start applying fluoride varnish in the front of the mouth and then move to the back. Alternatively, apply fluoride varnish to other teeth before beginning SDF application. If fluoride varnish is applied, the patient should be instructed to wait 30 minutes before eating or drinking.
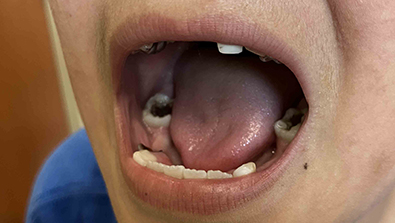
Large posterior caries.
Storage and Handling
SDF should be stored according to the manufacturer’s product insert and discarded after the expiration date on the package. SDF should be dispensed from multi-use bottles just prior to use, as it may precipitate if dispensed in advance or left exposed. The requirement to dispose of open multi-use vials of medications after 28 days does not apply to SDF multi-use bottles. Clean technique should be used when handling SDF bottles including wearing gloves and contact between the tip of the bottle and any surfaces should be avoided to prevent contamination.
Last Updated
07/23/2024
Source
American Academy of Pediatrics