The new My Account Hub is part of the AAP’s Digital Transformation Initiative; striving to connect, personalize, and simplify your experience. This page details the enhancements and continuous quality improvements that we’ve made. These changes, along with the newly designed transcripts tool and search application, are geared towards providing a better overall experience.
We are using an iterative approach and this is the first round of changes to My Account. Over time our goal is to house all key account information and actions in this new My Account page.
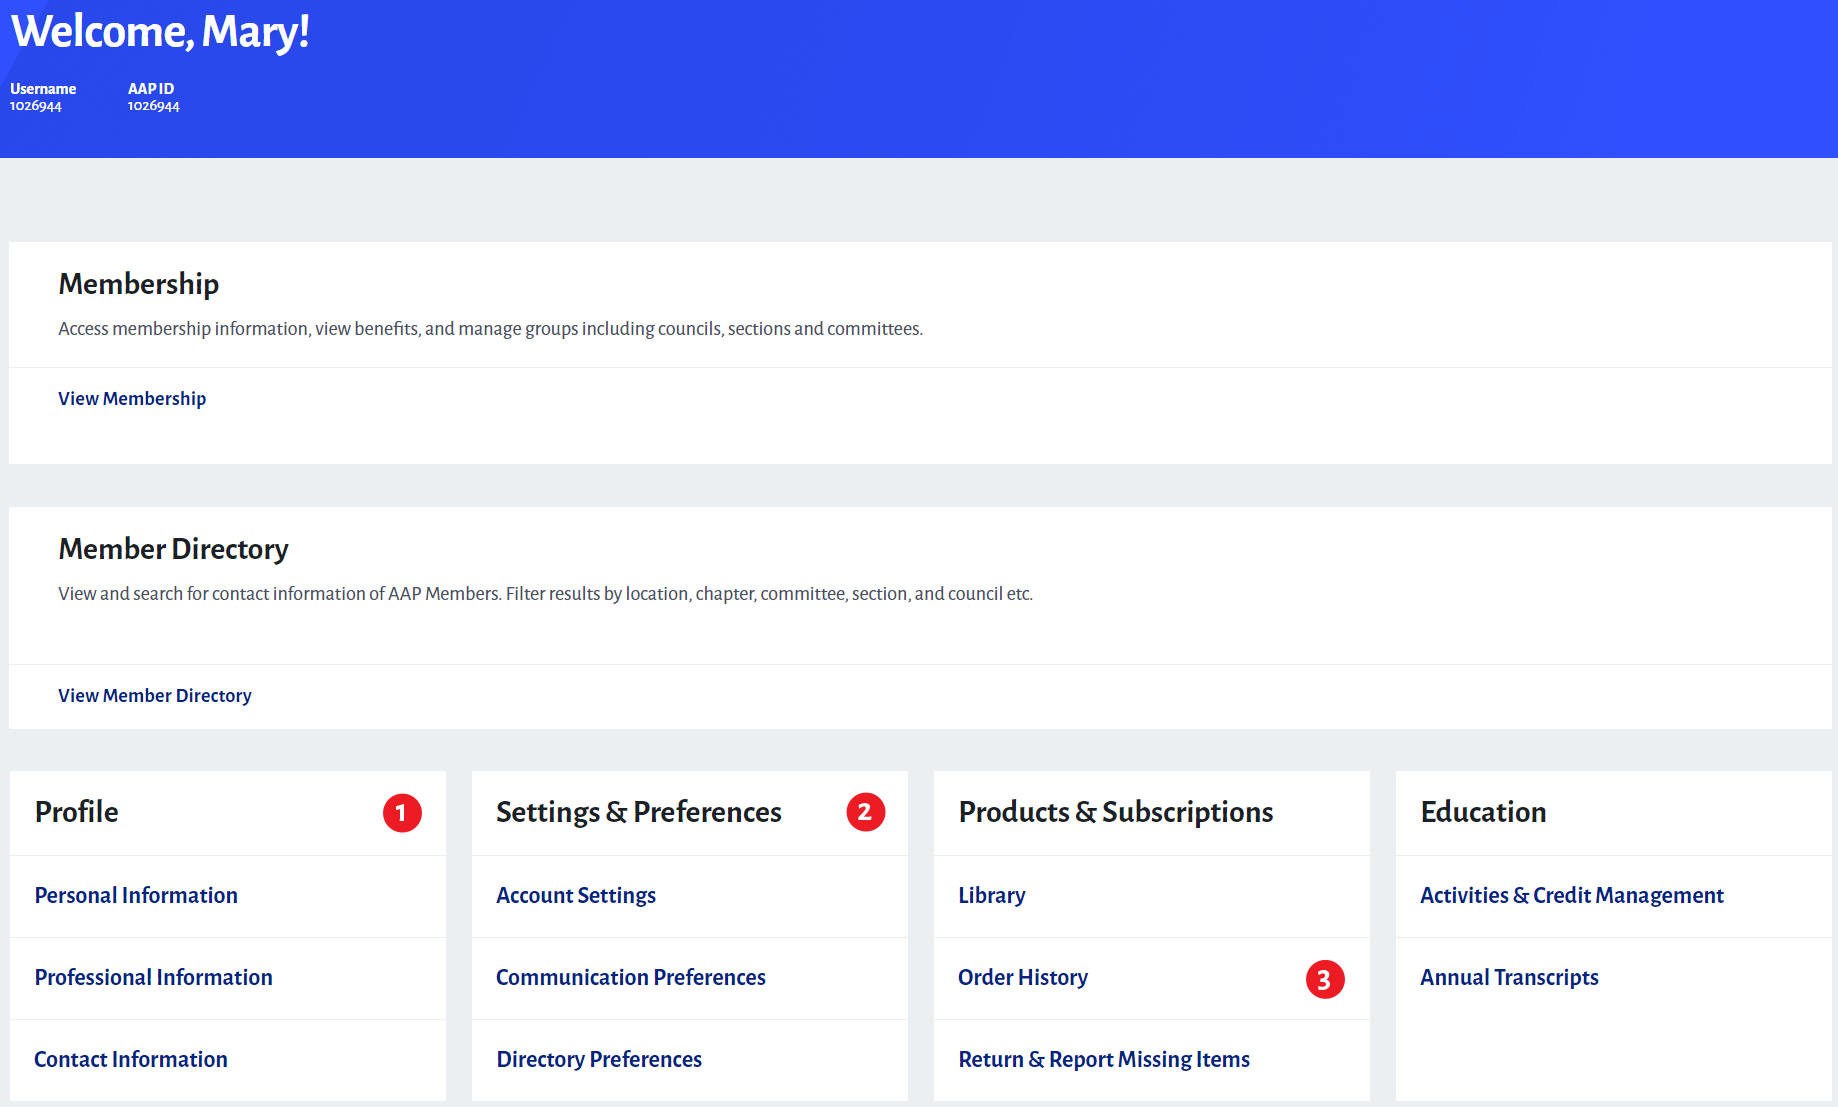
1. Profile
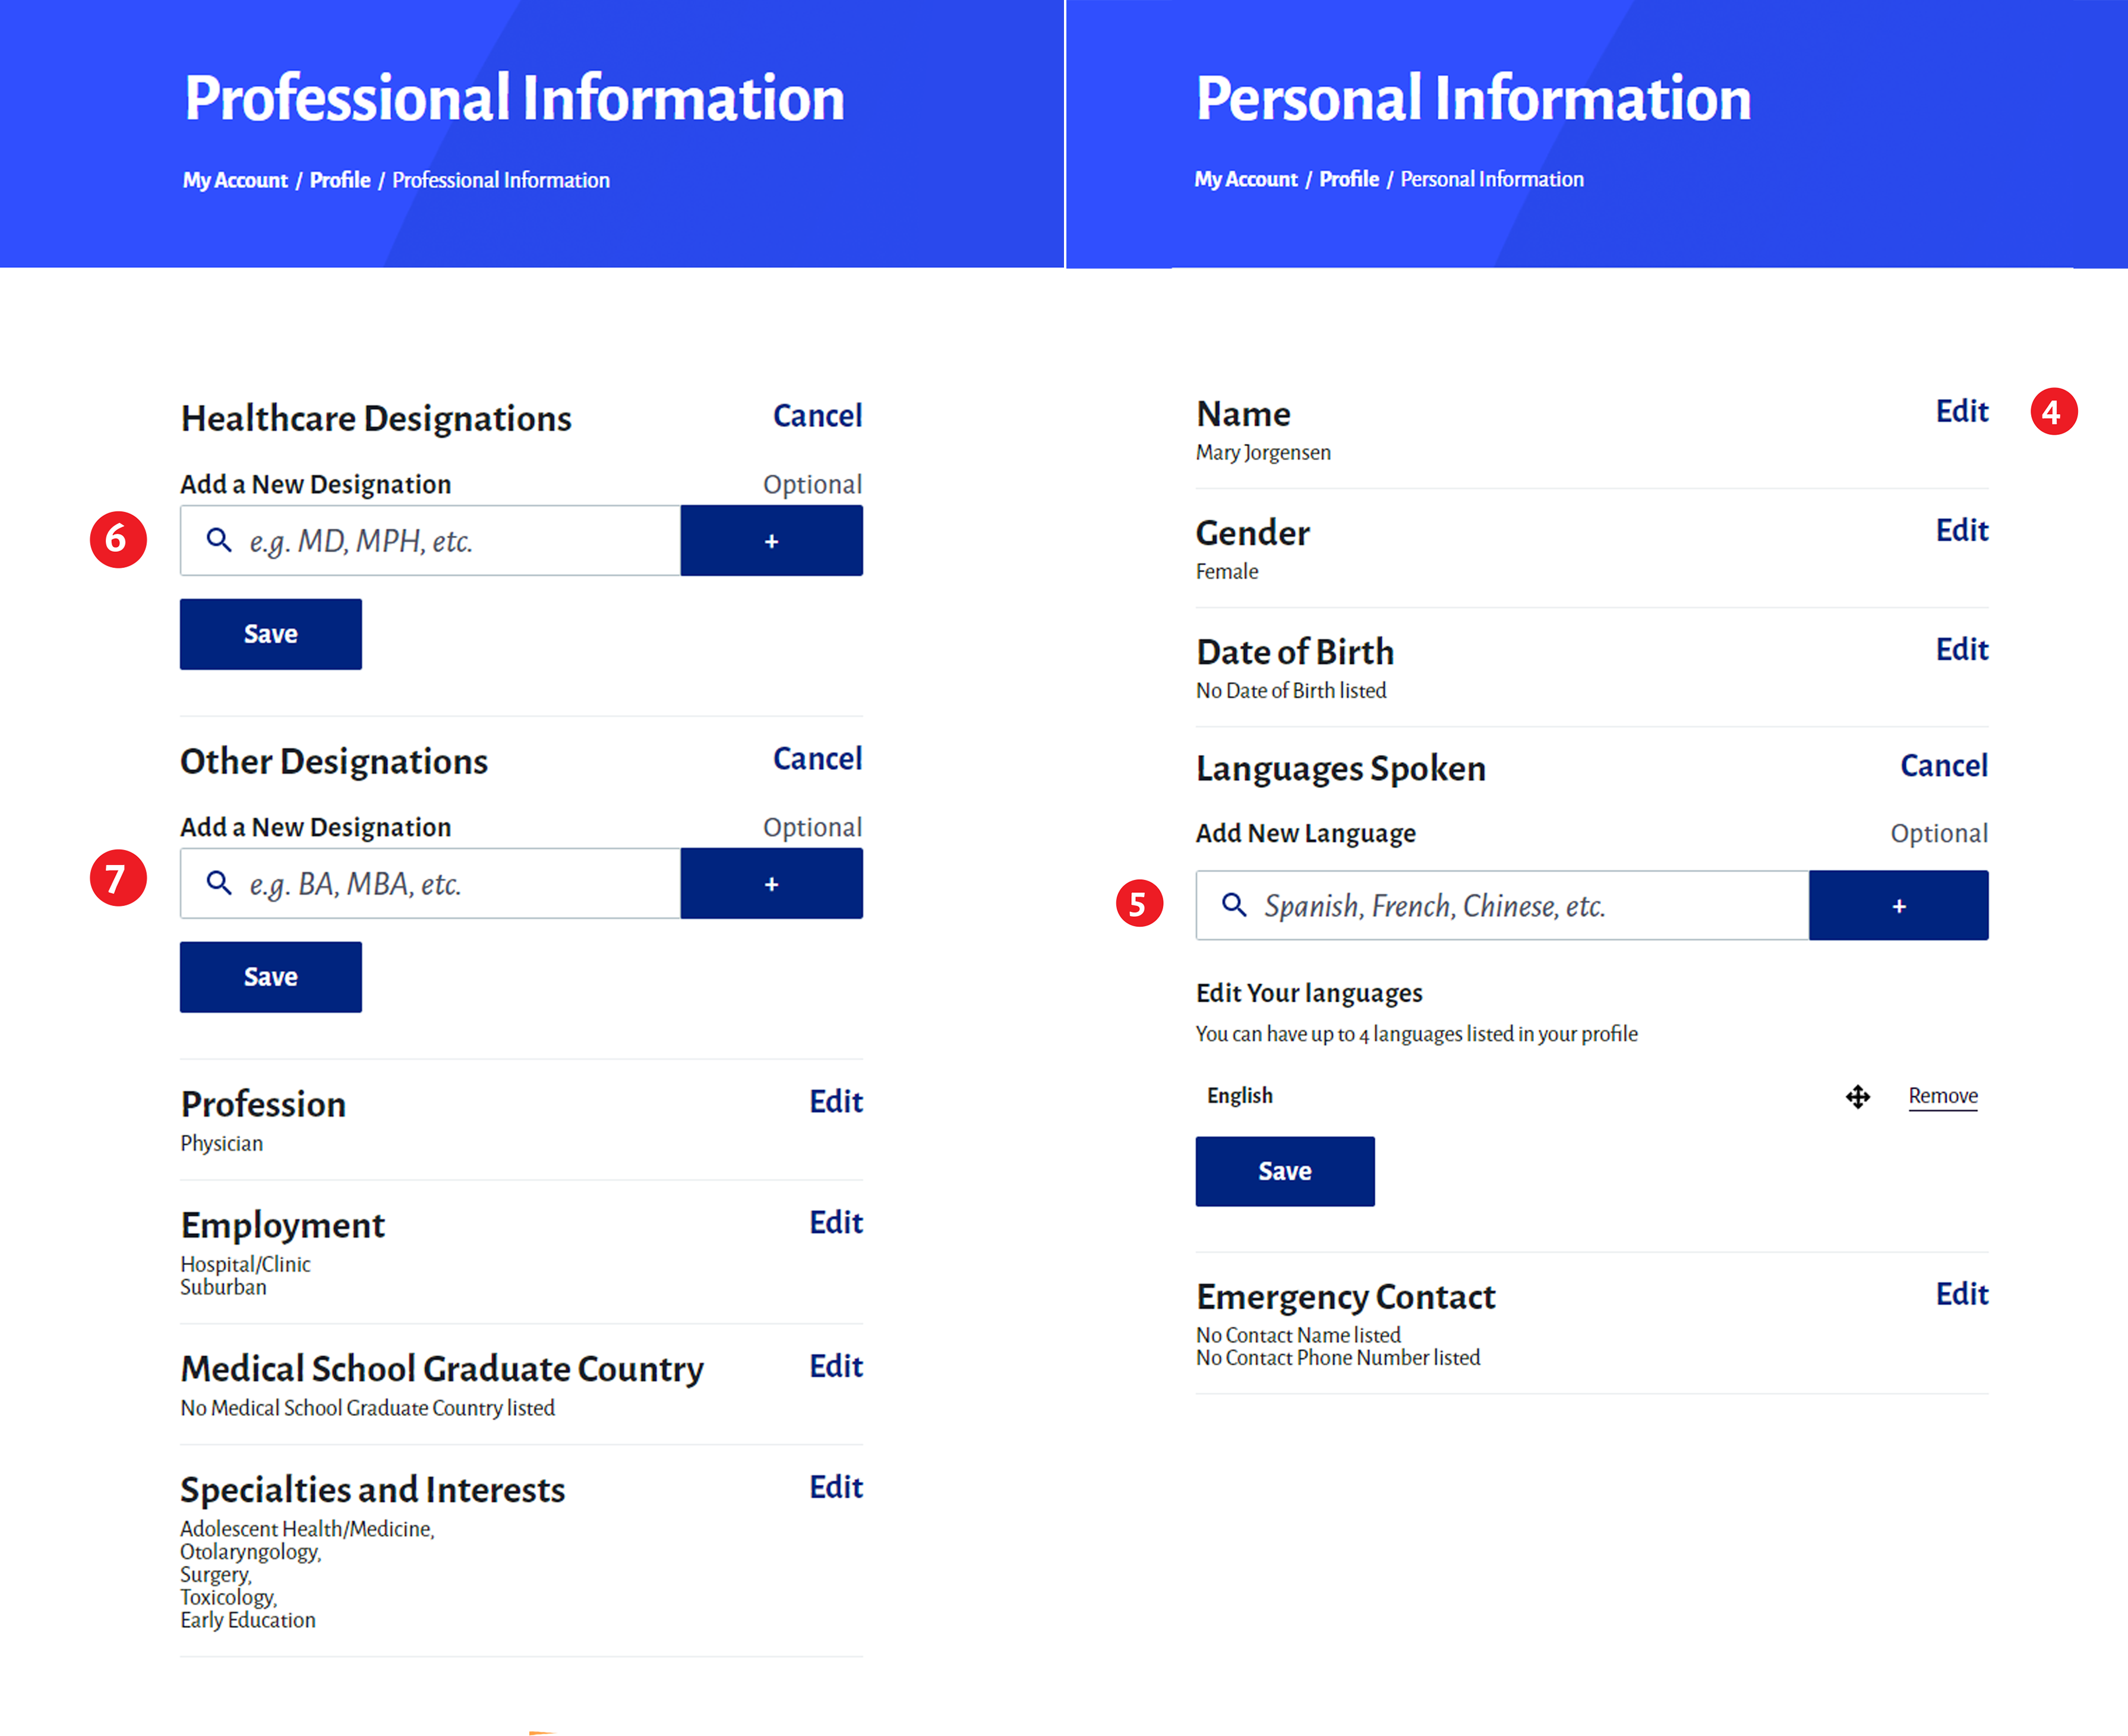
Your account information is now divided into personal, professional, and contact information. Personal information houses basic information often provided during sign up. You can update your professional designations, employment setting, or interests on the professional information page. Finally, contact information is set up to easily manage the multiple addresses, emails, phone numbers, and faxes associated with your account.
2. Settings & Preferences
Account settings will help you manage your user name, password, and security questions. The communication preferences page allows you to edit how the AAP communicates with you.
3. Order History
Your Order history is searchable, filterable, and sortable making it easier to find exactly what you need.
4. Edit
Throughout your account, simply click “edit” to modify information.
5. Languages Spoken
To add a language to your profile, begin to type the name of the language. As you type, available languages will appear in a list below. Select the language you would like to add and click the plus button to add it to your profile. You can also click and drag to re-order languages or click the remove link to delete them.
6. Healthcare Designations
Designations are now divided into two categories and those that are specific to healthcare have been priortized.
While most of your account information will already be present, you may have to add your healthcare designations. Begin by typing the designation you’d like to add and then select from the list provided below. Click the plus button to add it to your profile. You can also click and drag designations to re-order them or click to remove them.
7. Other Designations
Other degrees and designations that are not specific to healthcare can be added in this field. Our team researched what designations users were searching for and simplified this list to match their priorities.
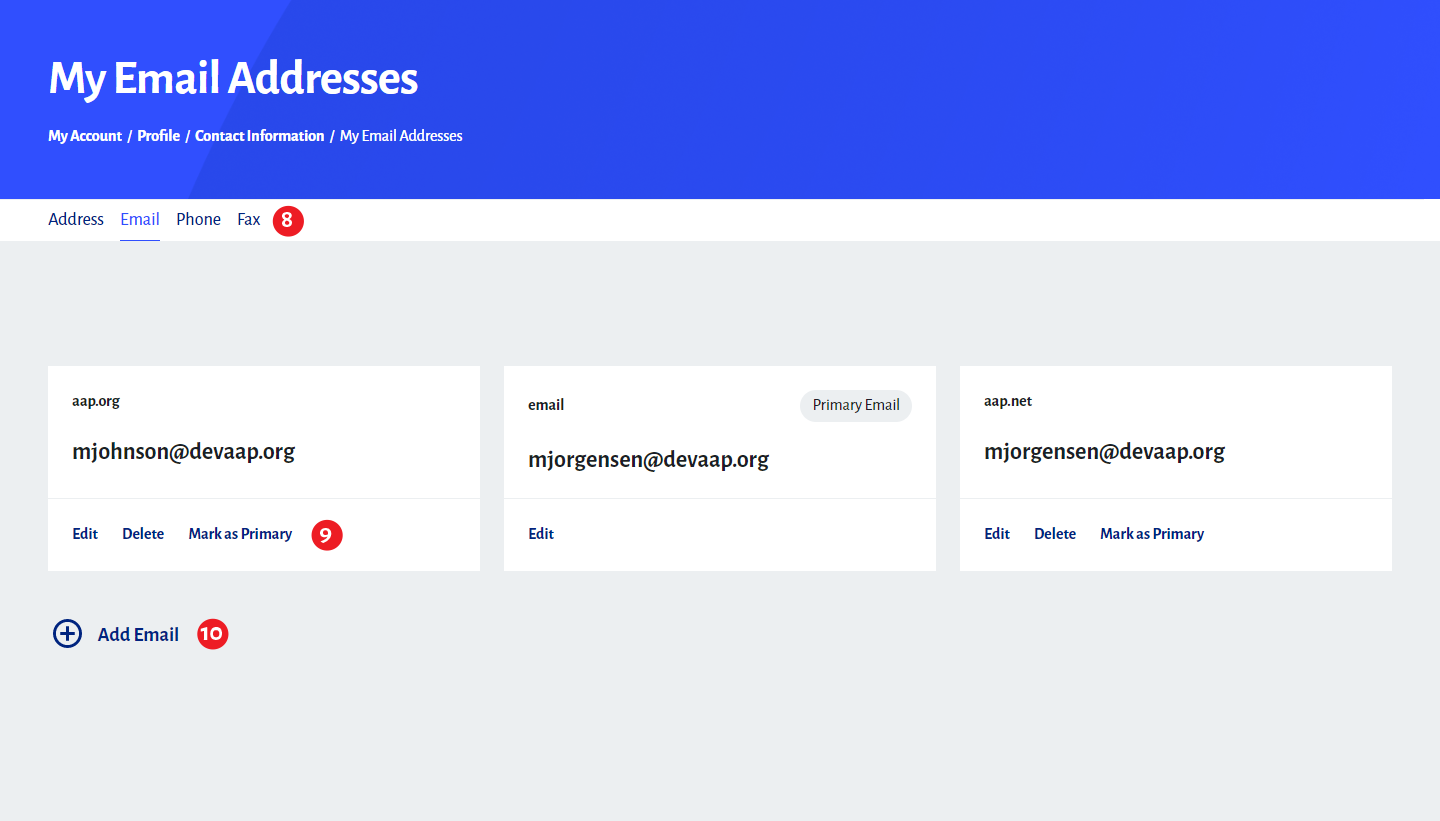
8. Contact Information Tabs
These links at the top of the page allow you to toggle between email, address, phone, and fax information.
9. Edit, Delete, and Mark as Primary
Click to edit or delete contact information. If you try to edit or delete a contact method that is currently linked to a subscription, we will notify you before you save any changes. You can also choose to mark a piece of contact information as the primary email, address, phone, or fax AAP should use when contacting you.
10. Add New Information
Click the add button at the bottom of the page to add a new contact method.
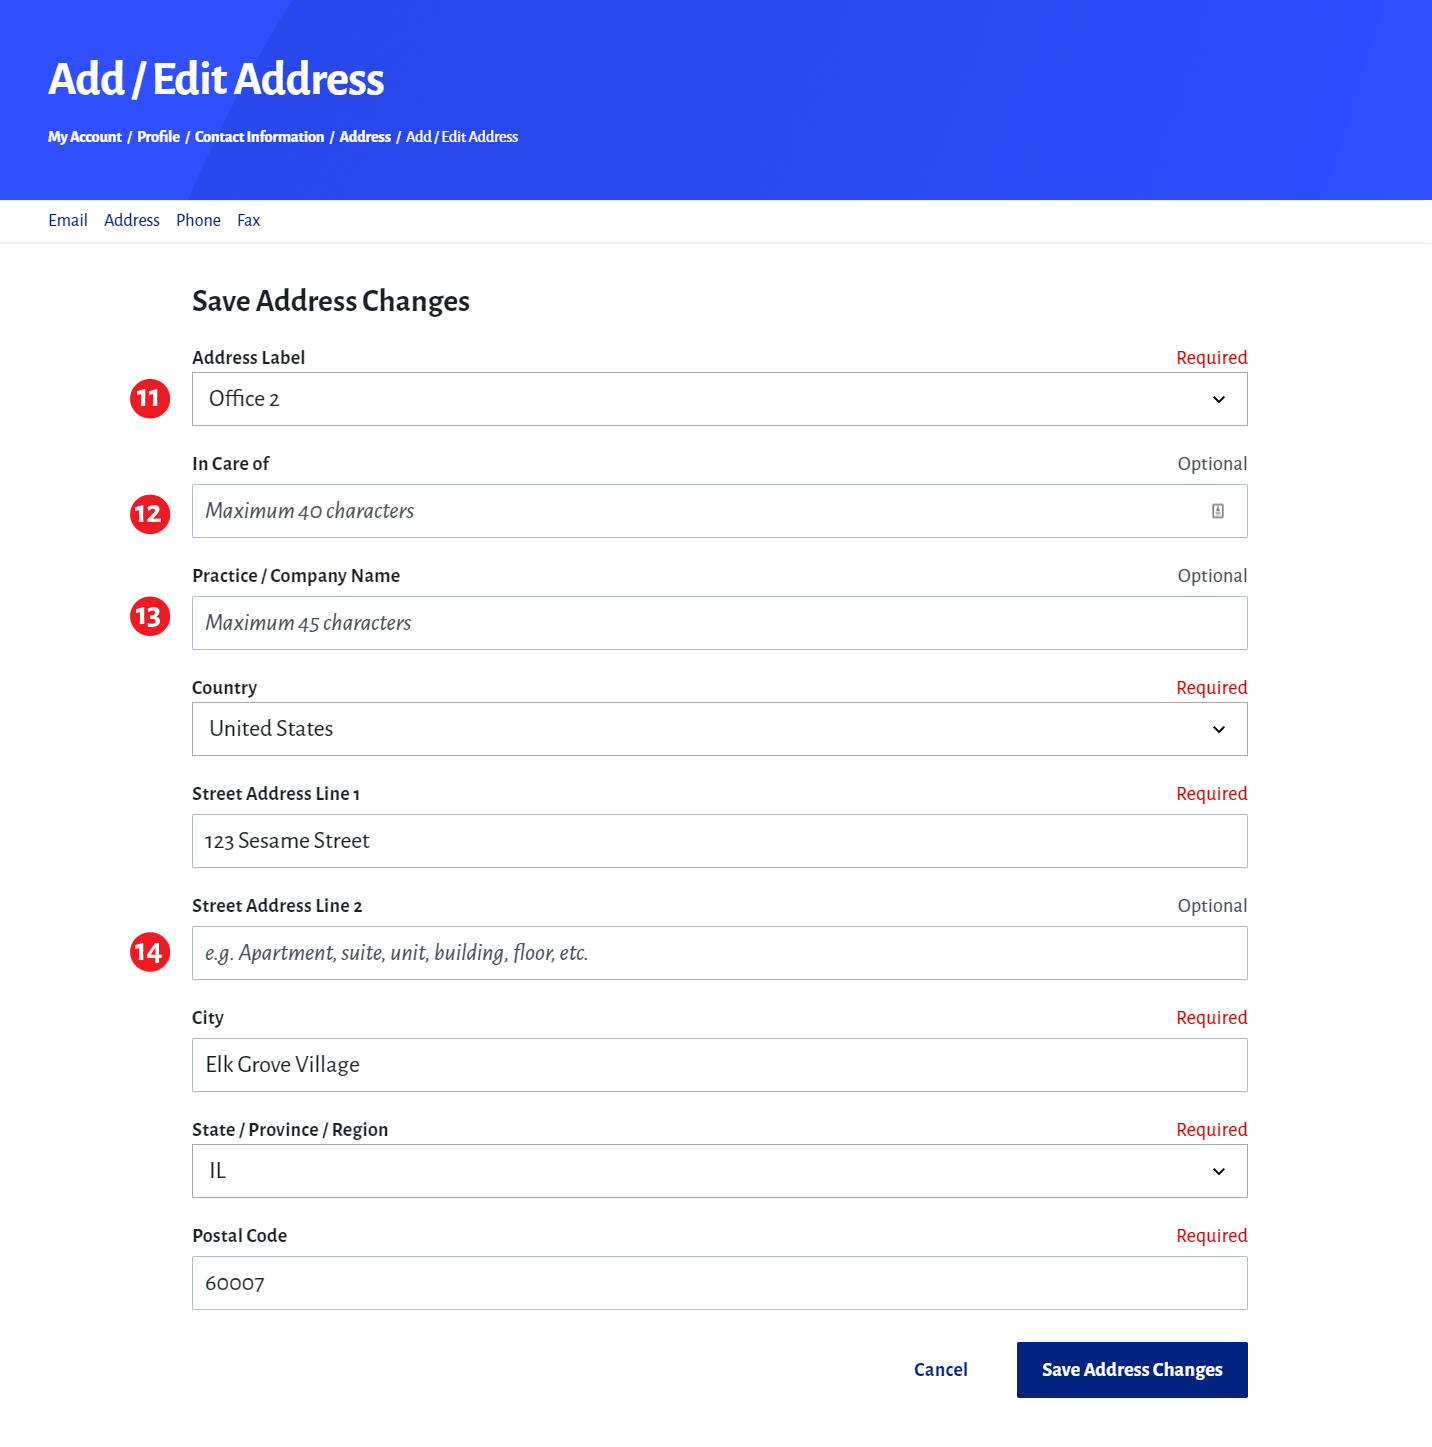
11. Address Label
You’ll be asked to assign each contact method a label. This label will then appear wherever that contact information is displayed. This feature is meant to help you further identify and distinguish between the various addresses, emails, phone numbers, and faxes associated with your account.
12. In Care Of
With this new input field, you can now ship to an address while noting that mail should be in care of someone else.
13. Practice/Company Name
This new input field allows you to include your practice or company name within an address.
14. Street Address Line 2
We also added an optional Address Line 2 field. The placeholder text clarifies that this input field can be used for apartment, suite, unit, building, and floor information.
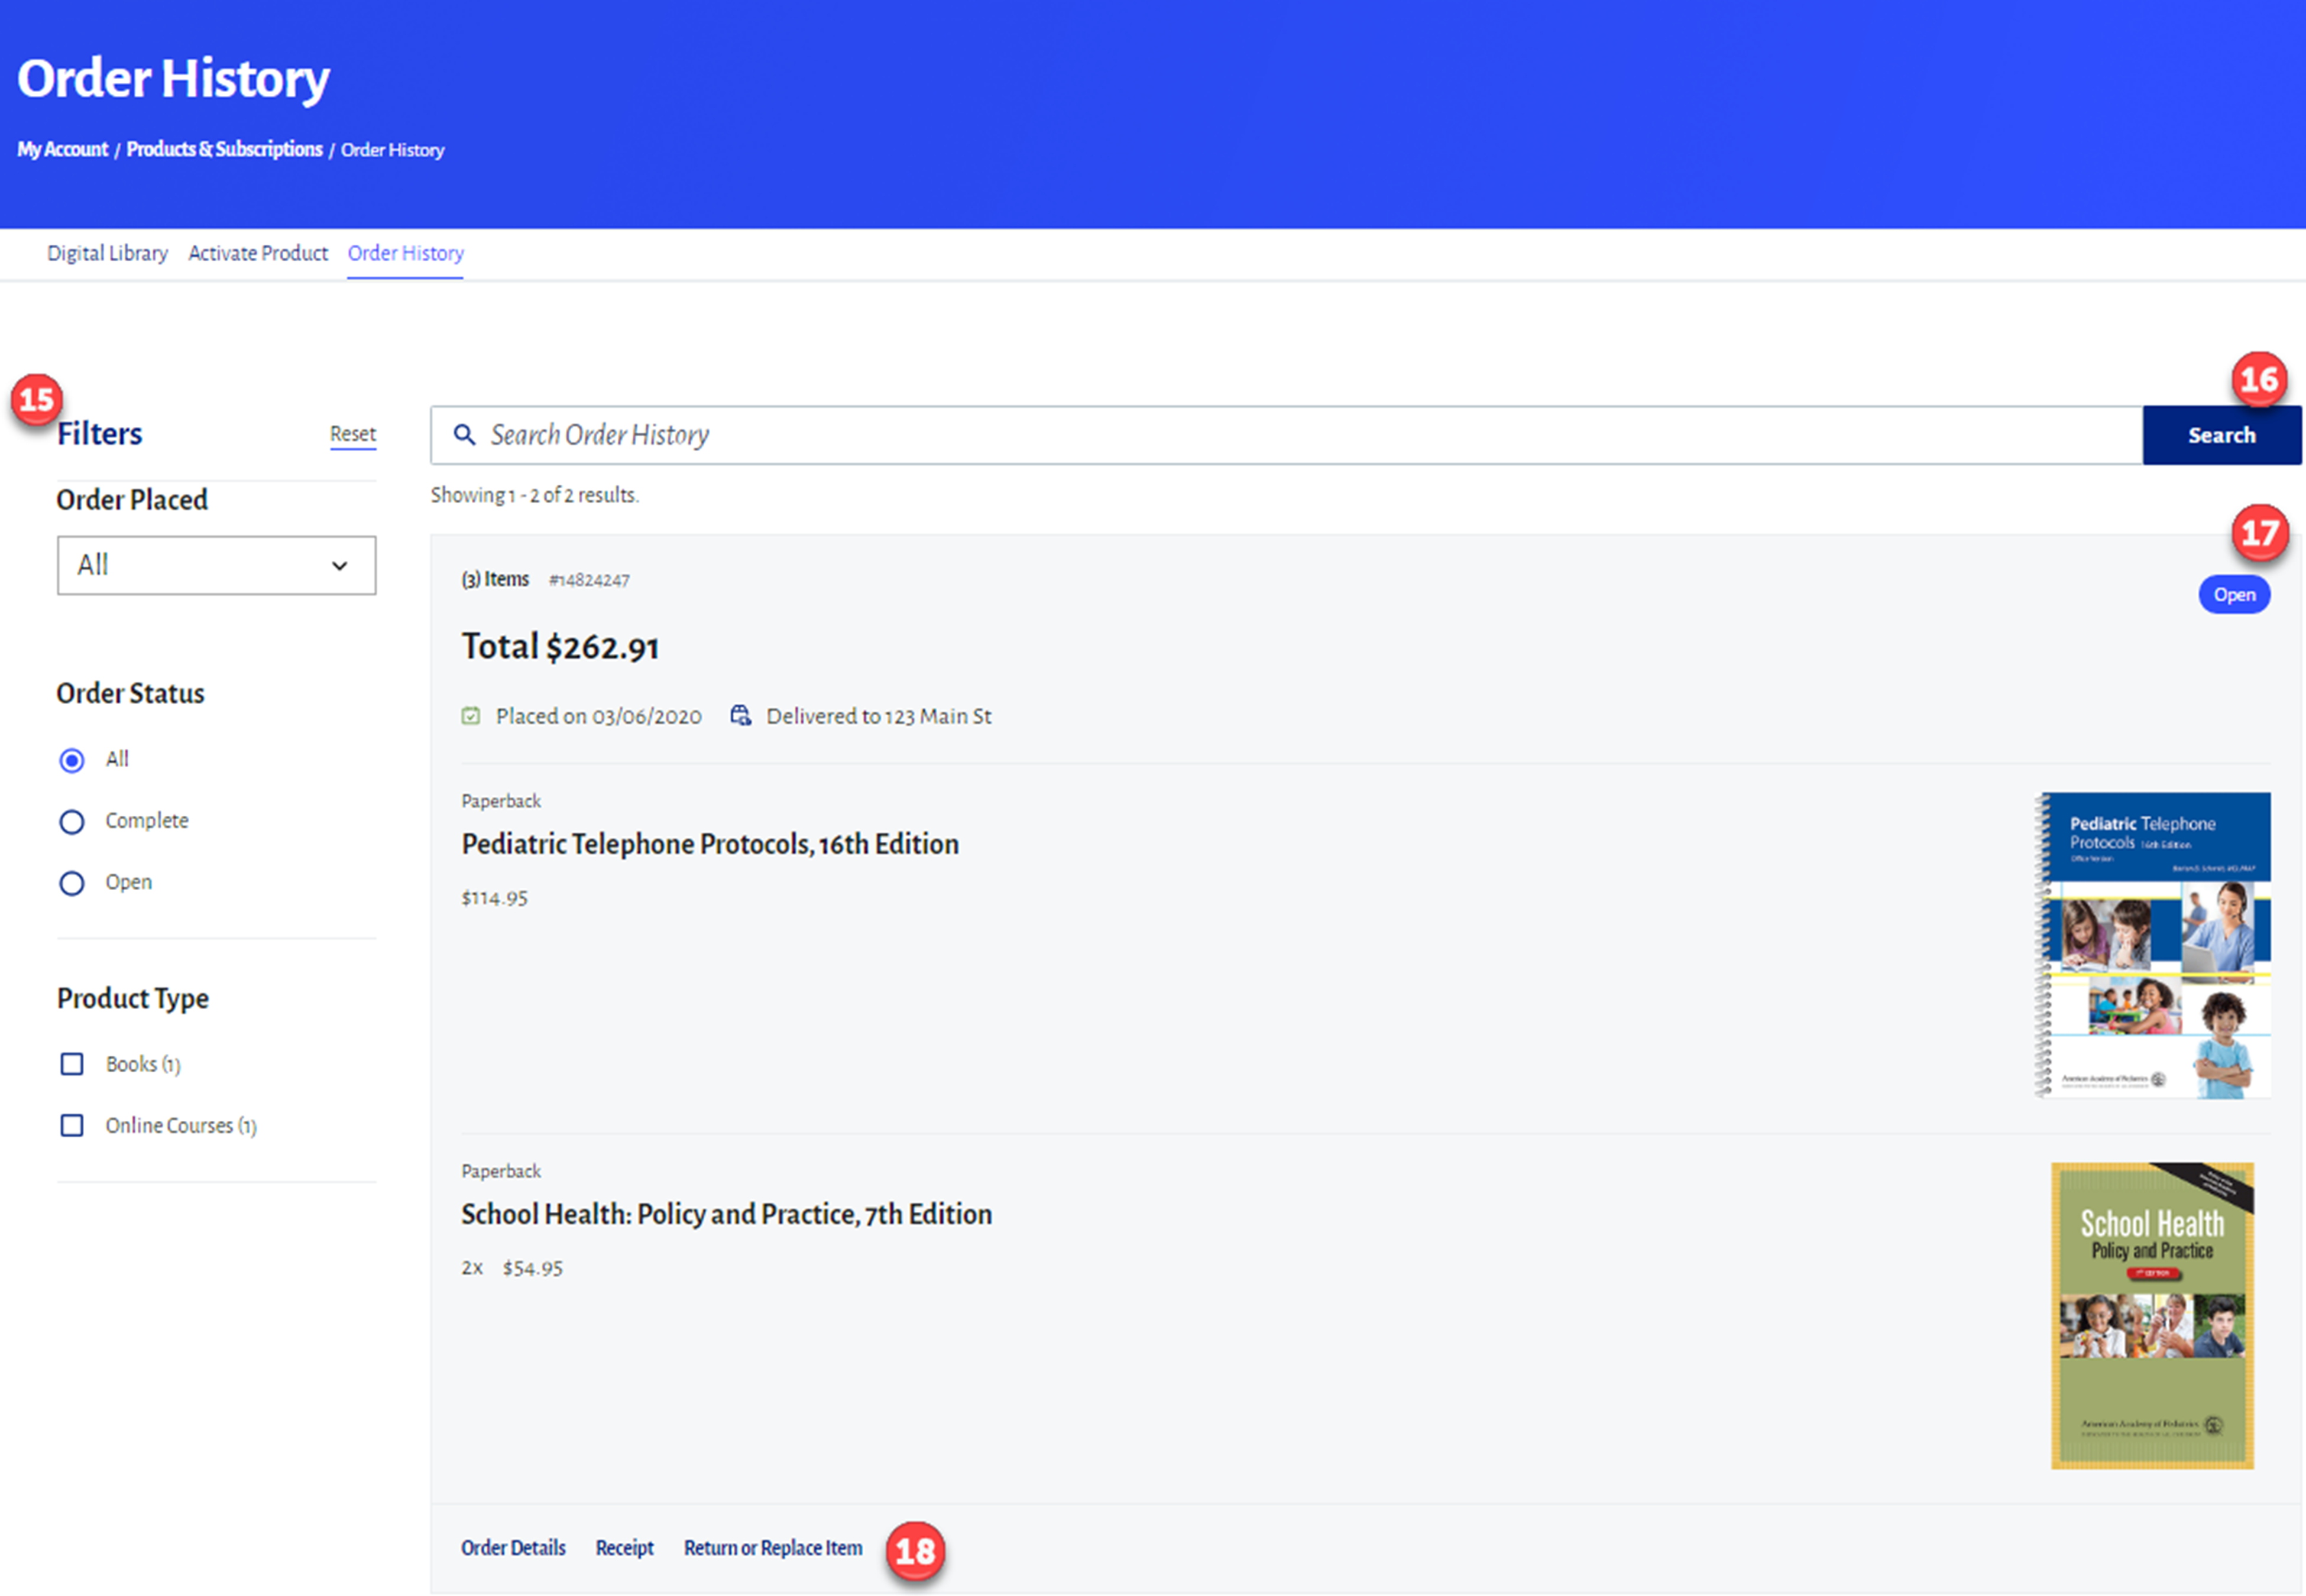
15. Filters
Within your order history, the filters panel on the left allows you to view your orders by year, status, and product type.
16. Search
You can also search for keywords within an order.
17. Order Information
For each order you'll be able to see the number of items, order number, total, the date the order was placed, the ship to address, as well as line by line details of the items that were purchased.
18. Order Details, Receipt, and Return Links
At the bottom of each order card are links to view order details, view a receipt for all items purchased, or return/replace an item.
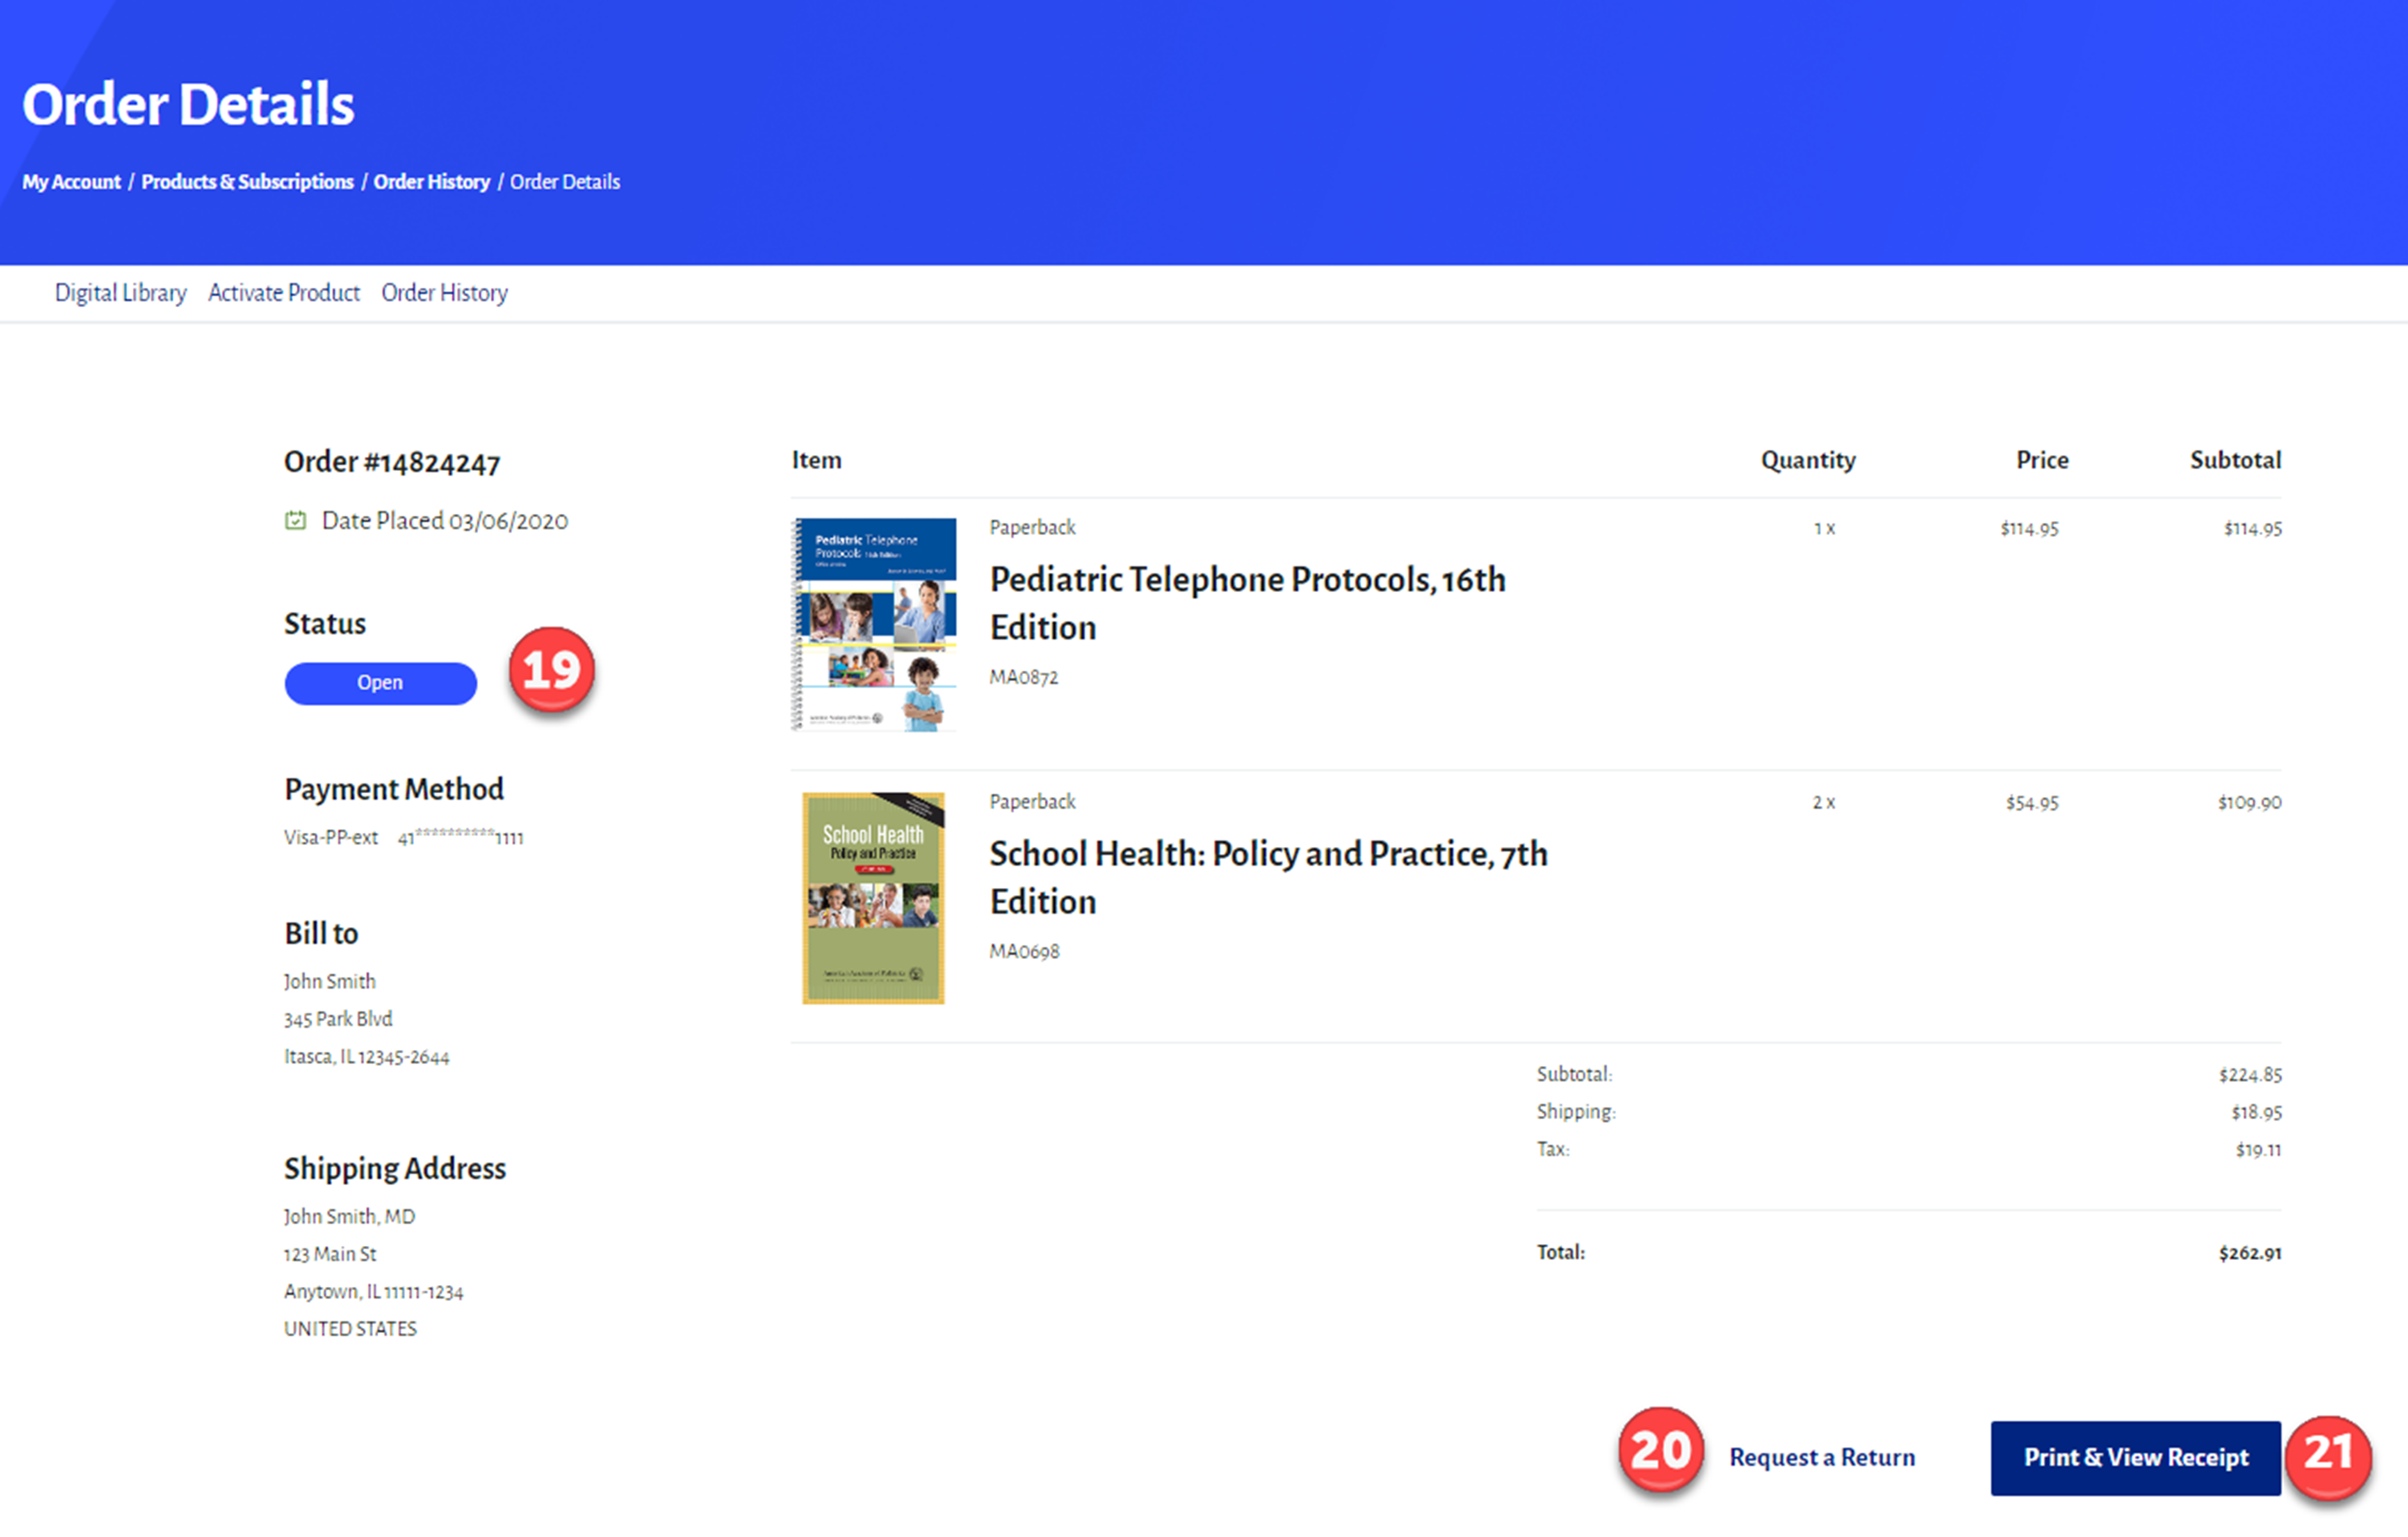
19. Order Details
In the left-hand column of the order details page you will find additional information about the order status, payment method, billing address, and shipping address.
20. Return or Replace Items
At the bottom of the page is a link to return or replace items. This link will take you to a form where you can submit your request.
21. View or Print Receipt
On the details page there is also a button to view or print the receipts for these specific items. After clicking View or Print Receipt, at the top of the receipt page is a button to print out an invoice for your order. The printable receipt displays all the same information as the order details page, with a few additional details, such as your AAP ID to make invoicing easier.