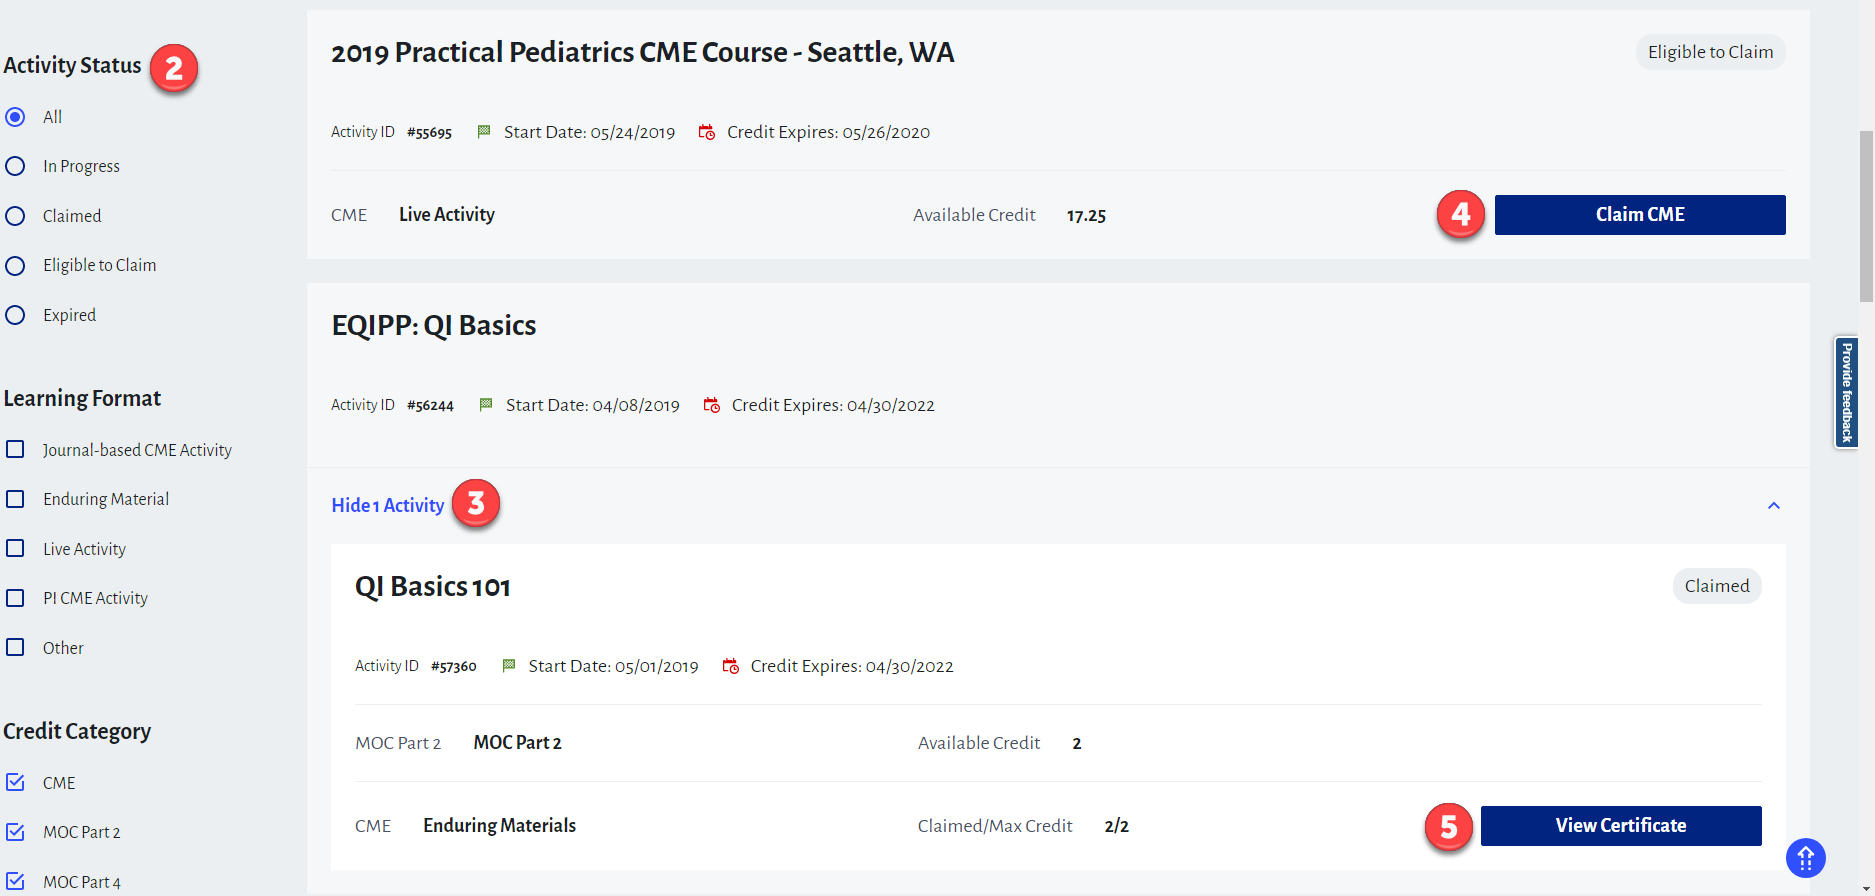
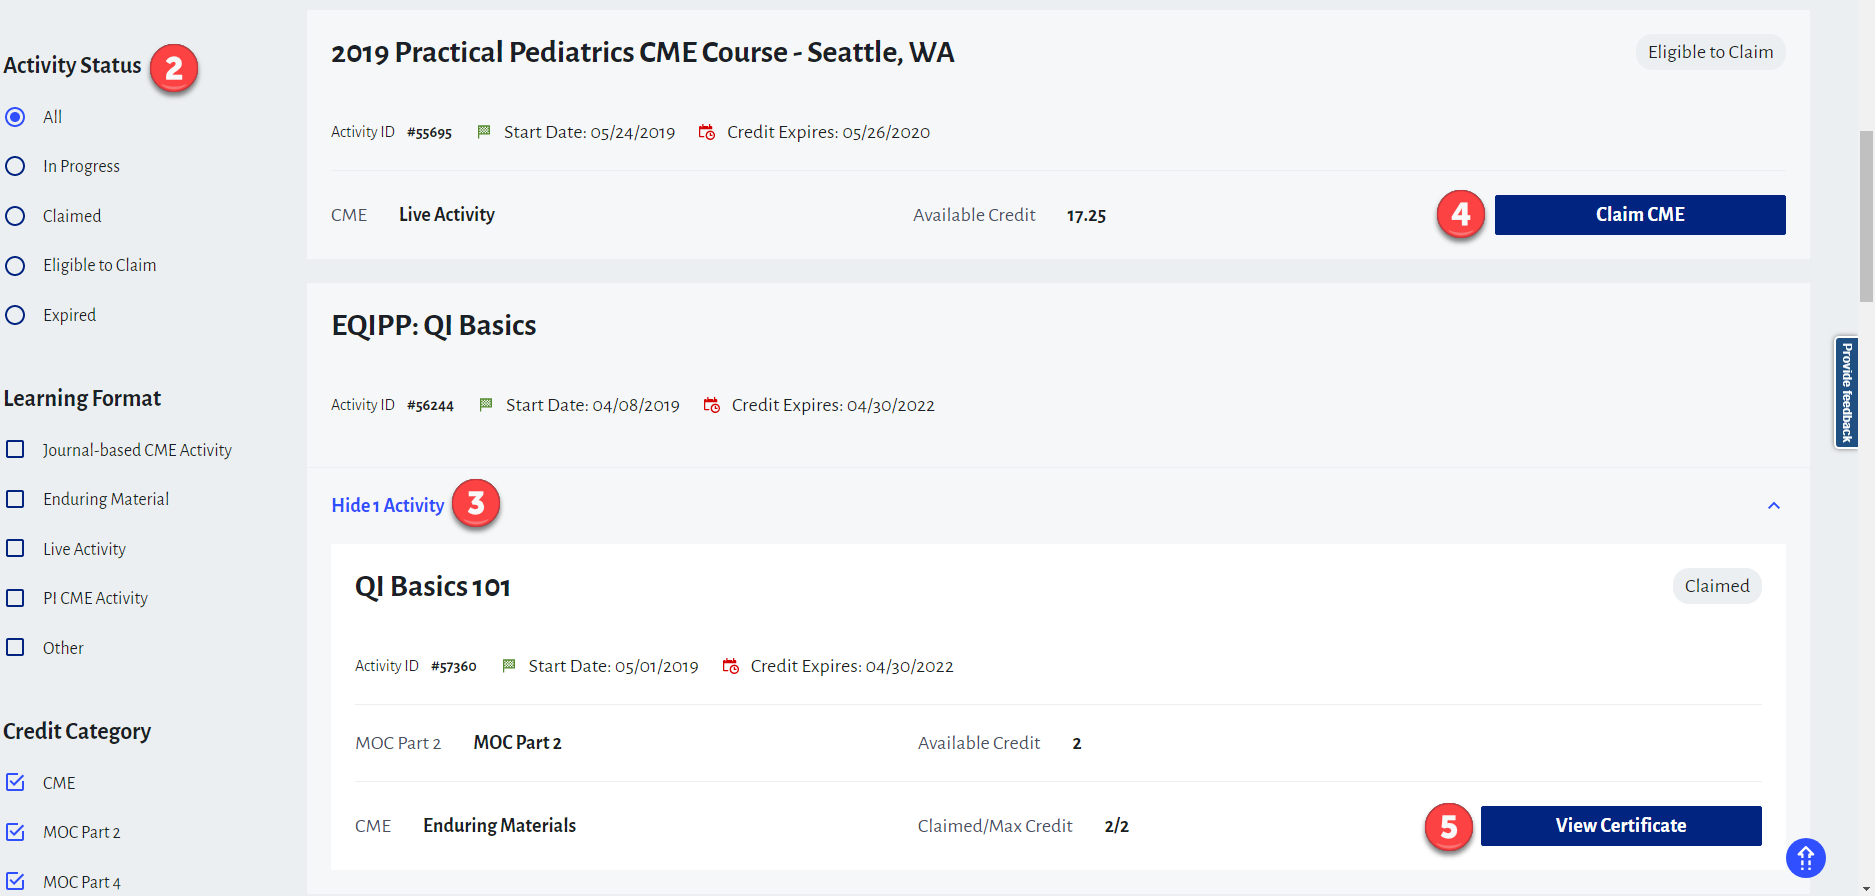
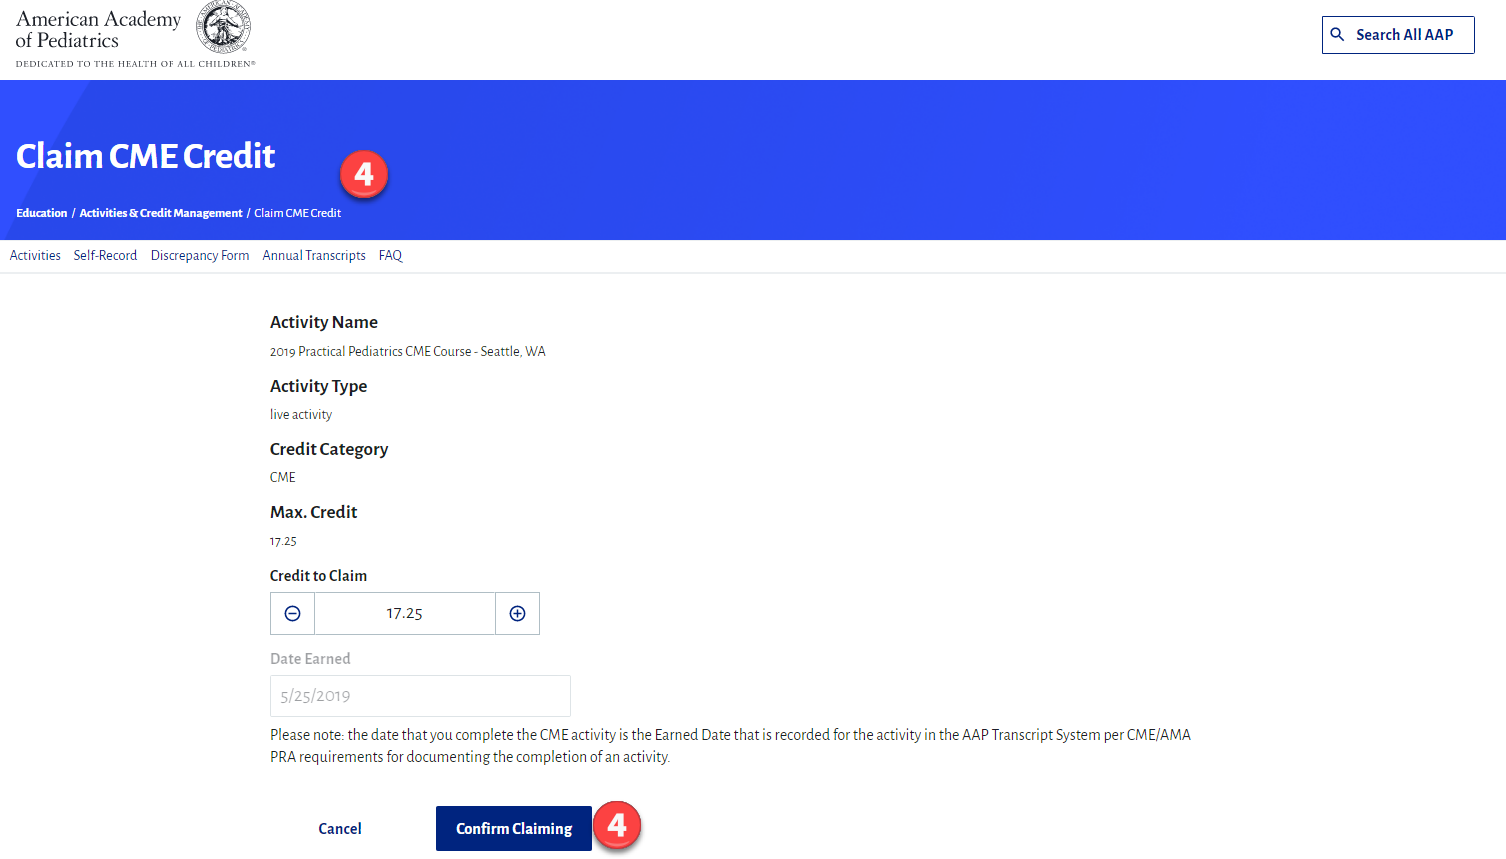
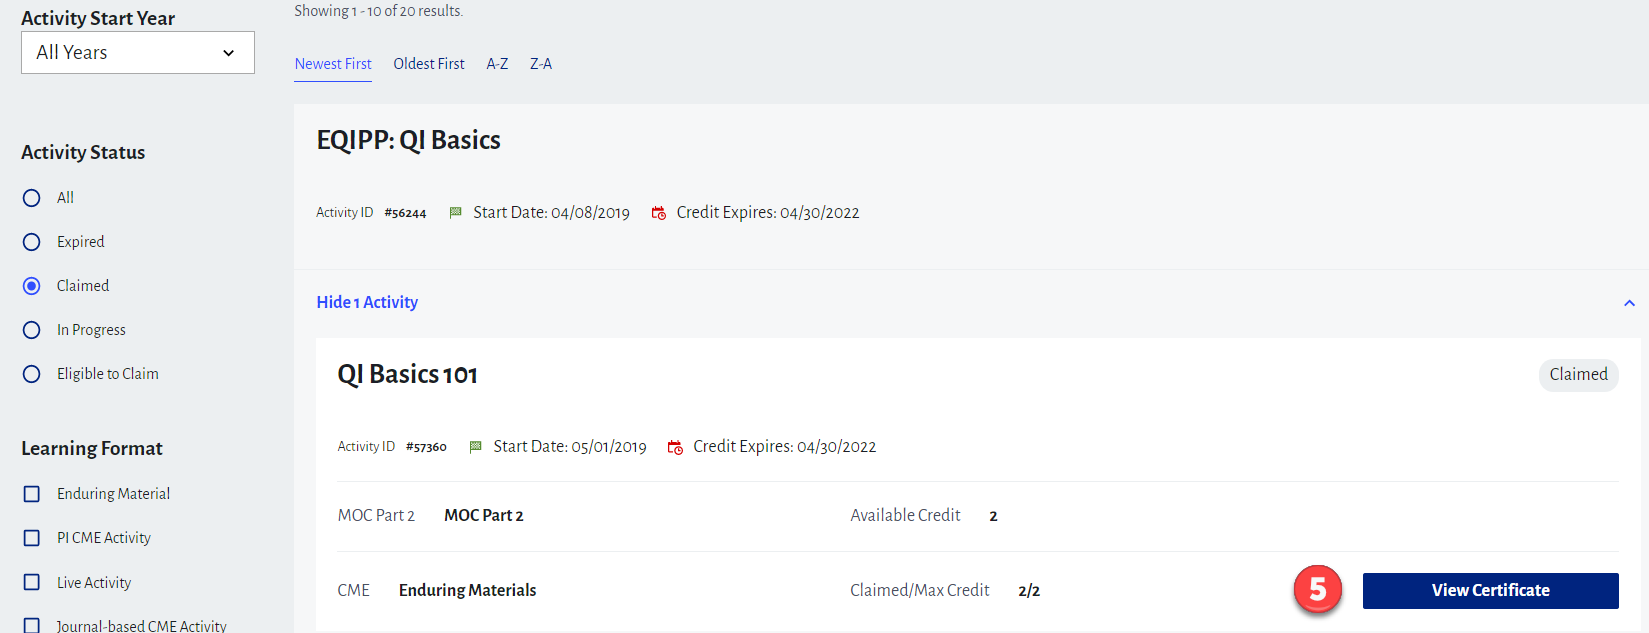
The new transcript management tool is part of the AAP's Digital Transformation Initiative and our continued goal to connect, personalize, and simplify your experience and are geared towards a better overall credit claiming experience. The numbered list below corresponds to the images that follow.
1. Search Your Activities
a. You should recognize this prominent search bar from the redesigned AAP.org search page. Within transcript, this search bar allows you to search through your activities.
b. Click the "x" at the right edge of the search bar to clear your search results.
2. Filter Your Results
The filters in the left sidebar allow you to narrow the list of activities shown. Under 'Activity Status' you can view Claimed and Eligible to Claim credits. You can also filter by 'Credit Category' and 'Learning Format'. These filters change based on your activities. 'Activity Start Year' defaults to 'All Years' or you can select a particular year if you know the year the activity you are looking for started.
3. View Included Activities
Activities may be grouped together. When you want to see the individual activities, click the 'Show Activities' link. This will expand to show each of the included activities. Once those activities are visible, you can click 'Hide Activities' to minimize them.
4. Claim Credits
Claim credit by clicking the 'Claim Credit' link shown in the bottom right hand corner of the activity card. You'll then be asked to enter the number of credits in order to confirm your claim.
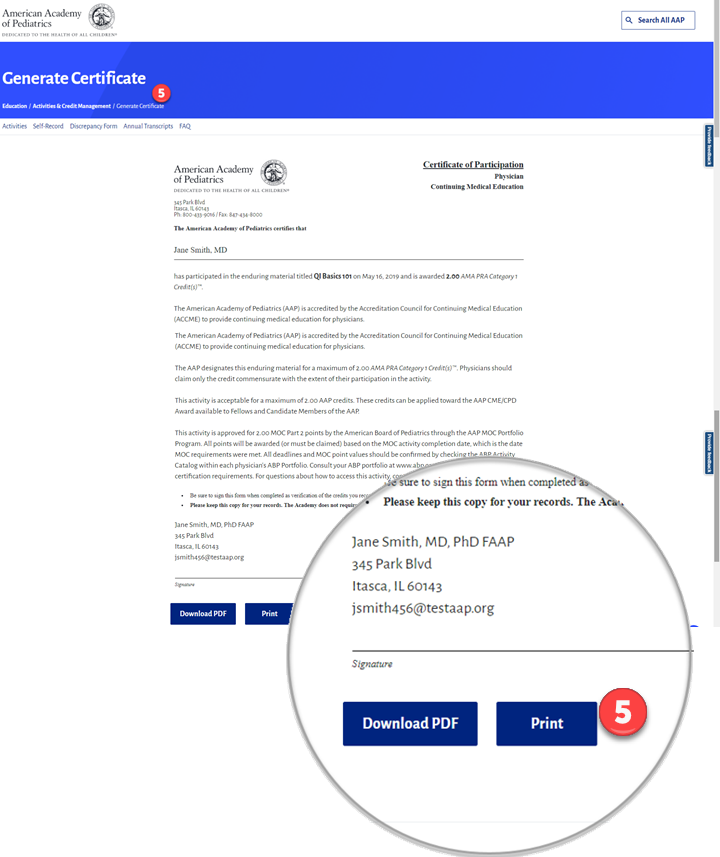
5. Print Certificates.
There are two ways to print certificates.
a. If you are viewing your list of activities for the year in which you earned the credit (i.e., 'Earned Date'), the 'Claim Credit' link will be replaced with 'View Certificate'. You can click that link to view, download, and print your certificate.
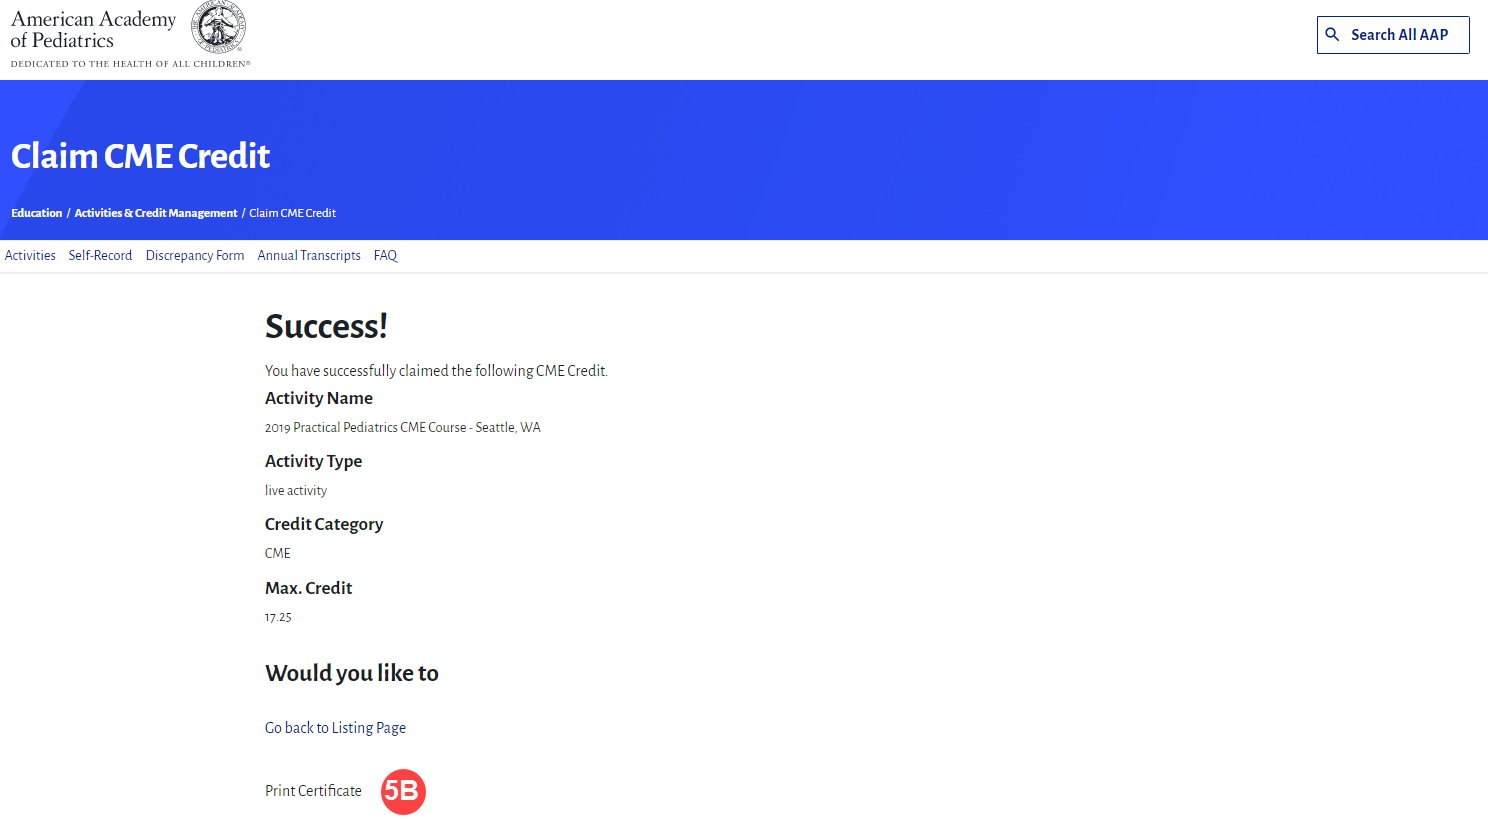
b. Or, once you claim an activity, on the Success page, click the 'Print Certificate' link.
6. Print Annual Transcripts
To generate annual transcripts of your activities, you can click on 'Annual Transcripts' above the search bar next to the Filters area and follow the screen prompts to select the year and click the 'Print Transcript' button to print your report.
7. Eligible to Claim Toggle
There is a filter called 'Eligible to Claim' at the top left of the main screen. Turn it ON to see all of your activities that are ready for you to claim (you can do that by clicking on the right side of the toggle switch). To return to viewing the rest of your activities by year (or all your activities when you leave it set to 'All Years'), turn the toggle OFF (click on the left side of the toggle control). 'Eligible to Claim" set to ON is the default view.
8. Self-Claims
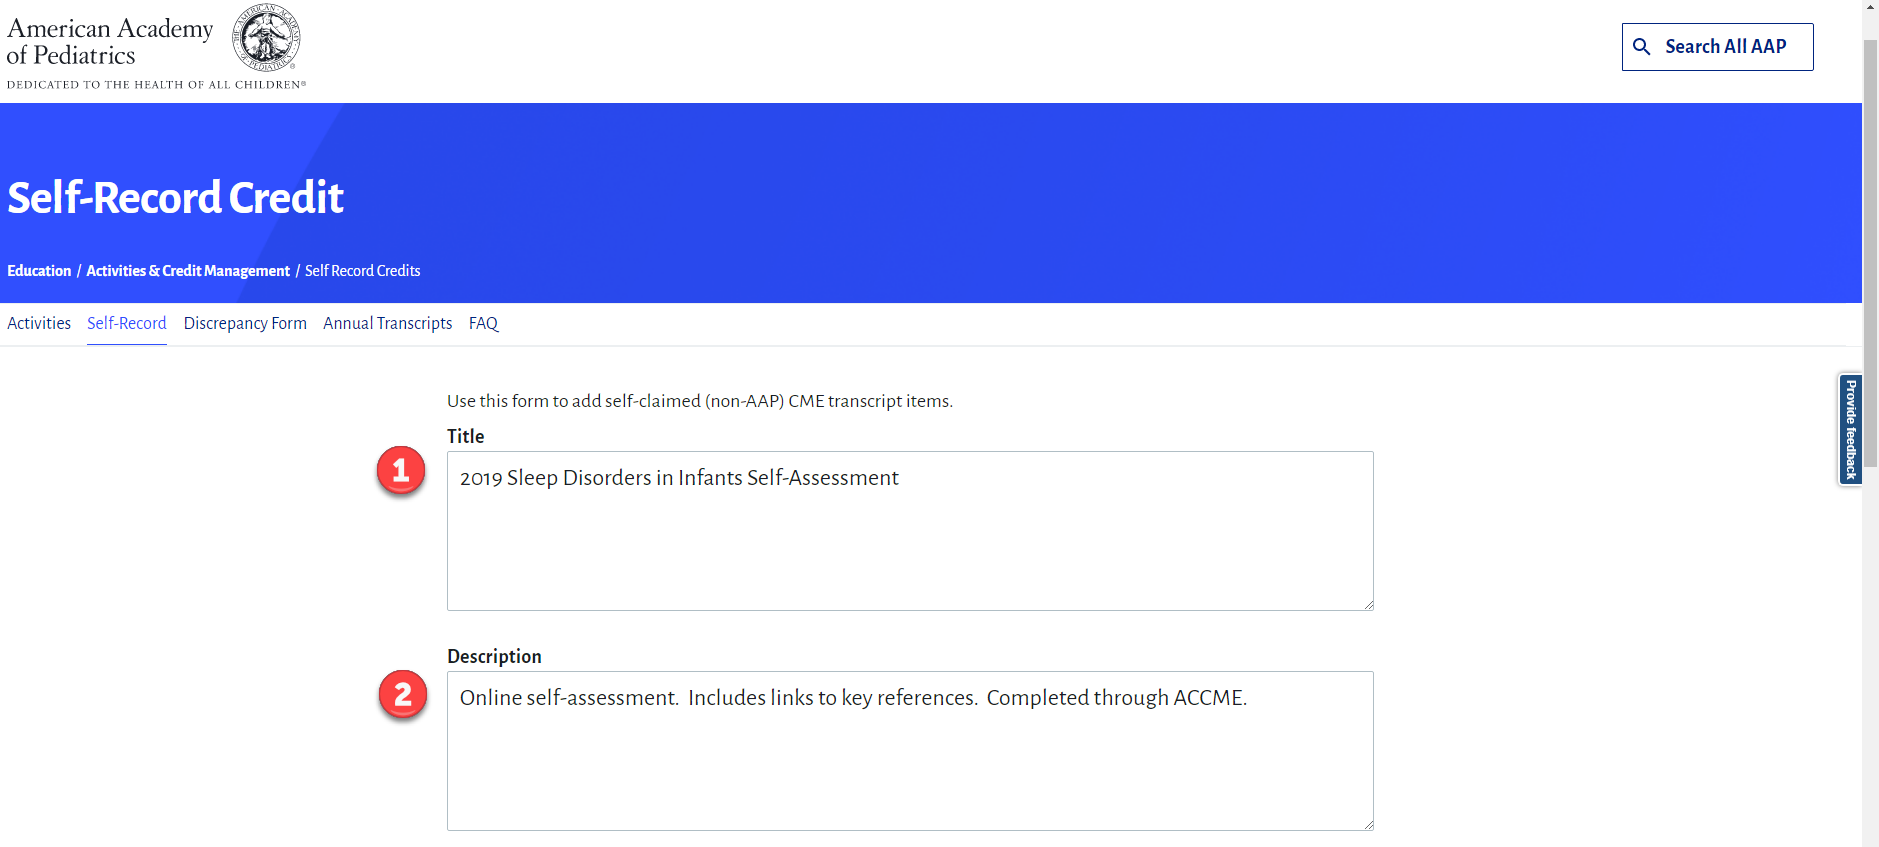
If you want to track activities that are not claimed through the AAP (whether for CME credit or MOC points), you can enter Self-Claims. Click on 'Self-Record' above the search bar next to the Filters area. Populate the fields as follows:
- Title: Name of the activity
- Description: Information about the activiity
- Credits to Claim: Number of credits you want to record.
- Credit Category: Either Category I or II.
- Earned Date: Date you completed the activity.
- Click Submit to record the Self-Claim.
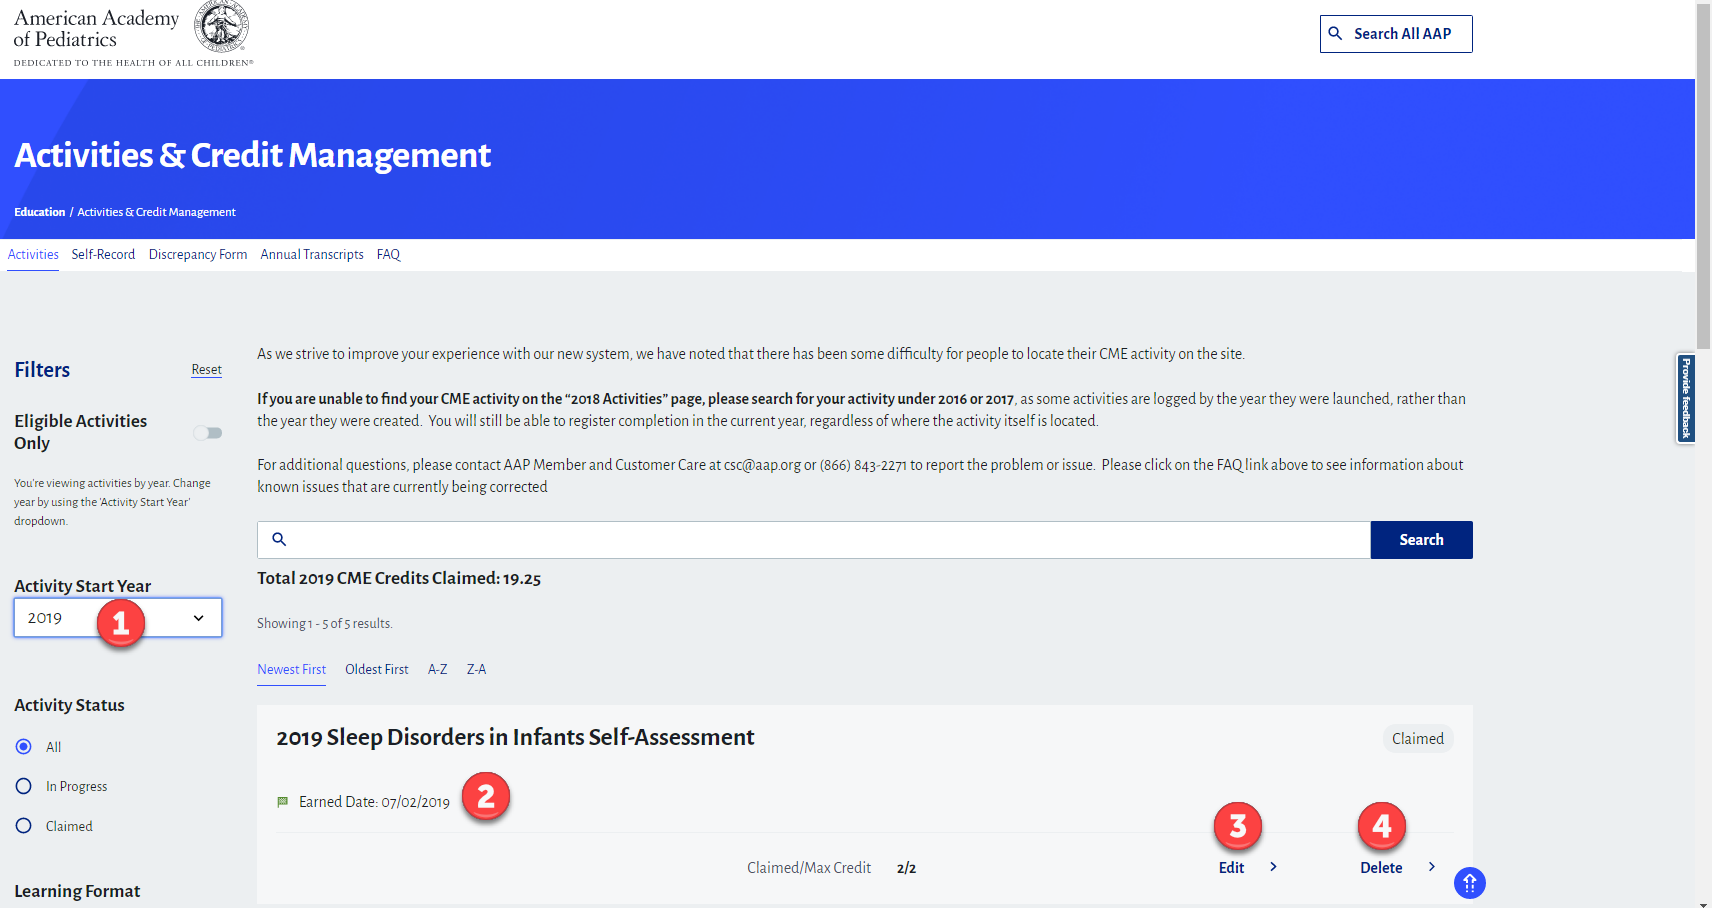
You can edit and delete Self-Claims as follows:
- Find a Self-Claim: To find a particular Self-Claim record, make sure the 'Eligible to Claim' toggle is turned OFF, select the year in the 'Activity Start Year' dropdown at the top left that matches the year you completed the Self-Claim. That date is the 'Earned Date' you entered in Step 5 above. For example, if in Step 5 you entered 4/15/18, you will find this Self-Claim under 'Activity Start Year' = 2018.
- Starts: Once you see the Self-Claim activity in your list, you will see the 'Earned Date' you entered listed as 'Starts On'.
- Edit: Click 'Edit' to change any of the information in Steps 1-5 above and 'Submit" again to update the information. Note: if you change the 'Earned Date' to a different year, you will have to pick that year in the 'Activity Start Year' to find it in your activity listing.
- Delete: Click 'Delete' to remove this Self-Claim from your record.
Main Screen for Viewing/Searching Activities
Screens for Claiming Credit and Printing Certificates
Claim Credit
Link to View Certificate (from Activity List)
View the Certificate (after prompted to select Profession (e.g., Physician))
Link to View Certificate (from Successful Claim Screen)
Screens for Self-Claims
Entering a Self-Claim
Editing or Deleting a Self-Claim
